
Connect Magnolia with Automation Tools
Automation tools like Zapier, Make, Celonis, Tray or MuleSoft are fantastic ways to create new automation pipelines for marketing automations or to trigger automations in general after you have done a specific action in magnolia. Since most systems are working very similarly, we will describe in an example of a submission form with the Magnolia Form module how you could trigger an action within Make and attach this to a Google Spreadsheet. In fact, this is just a simplified workflow for the thousands of possibilities that are available through these tools.
All Automation Tools are very similar in the way they structure processes. In most tools, you have to create a workflow, which is called zap in Zapier or scenario in Make, there are probably also other ways of calling it. Within such a workflow, we will create a trigger and a chain of actions.
Step 1: Create a form within magnolia
In our case, we will create a form within magnolia. This will be based on the magnolia form module. Imagine this should be a contact form, but in the end it could also be any other type of form. The goal we want to achieve is to summarize all form requests into a Google spreadsheet. Keep in mind that this is probably not a real-life scenario. This tutorial should only be a starting point for many, more complex solutions you could transfer yourself with this basic knowledge.
The form we're creating has 4 fields: firstname, lastname, email and text

Step 2: Create a custom form processor
To create a custom trigger for an external system, we need to extend the standard mail-based form processing chain and add a custom form processor to the configuration.
For that, you could go into the Configuration App and there you have to find the following configuration path: /modules/form/templates/components/form/formProcessors
Here, you could select sendContactEMail and duplicate the configuration node. After that, rename it as you prefer and add the following classname to the property class.
com.magnoliacentral.form.processor.ProxyPassFormActionProcessor
Notice that in this form, processors are triggered one by one. If you don't have an email properly configured in magnolia, I recommend turning the email processors off by changing the values in sendContactEMail and sendConfirmationEMail enabled to false. Otherwise, you could receive errors, and our tutorial will not work smoothly.
Now we have to add the class to your project; therefore, we create the package "com.magnoliacentral.form.processor"
Create the class ProxyPassFormActionProcessor
package com.magnoliacentral.form.processor;

import java.io.IOException;
import java.util.Map;

import javax.jcr.Node;

import org.apache.http.client.methods.HttpPost;
import org.apache.http.entity.StringEntity;
import org.apache.http.impl.client.CloseableHttpClient;
import org.apache.http.impl.client.HttpClientBuilder;
import org.slf4j.Logger;
import org.slf4j.LoggerFactory;

import com.google.gson.Gson;

import info.magnolia.module.form.processors.AbstractFormProcessor;
import info.magnolia.module.form.processors.FormProcessorFailedException;

public class ProxyPassFormActionProcessor extends AbstractFormProcessor {

	private static final Logger log = LoggerFactory.getLogger(ProxyPassFormActionProcessor.class);

    public void internalProcess(Node content, Map<String, Object> parameters) throws FormProcessorFailedException {
        try {
        	String              postUrl         = "https://hook.eu2.make.com/xxxxxxxxxxxxxxxxxxxxxxxxxxxxxxxx";
            Gson                gson            = new Gson();
            CloseableHttpClient httpClient      = HttpClientBuilder.create().build();
            HttpPost            post            = new HttpPost(postUrl);
            StringEntity        postingString   = new StringEntity(gson.toJson(parameters));
            post.setEntity(postingString);
            post.setHeader("Content-type", "application/json");
            httpClient.execute(post);
        } catch (IOException e) {
            log.error("Unable to send data to postUrl");
        }
    }
}
Please notice that for this scenario, we are hard-coding the postUrl. In a real-life scenario, you might consider adding a configuration or a dialog field for that. But since this is a user preference, we won't deal with it here. The correct URL will be created in the following step.
Step 3: Create a new workflow
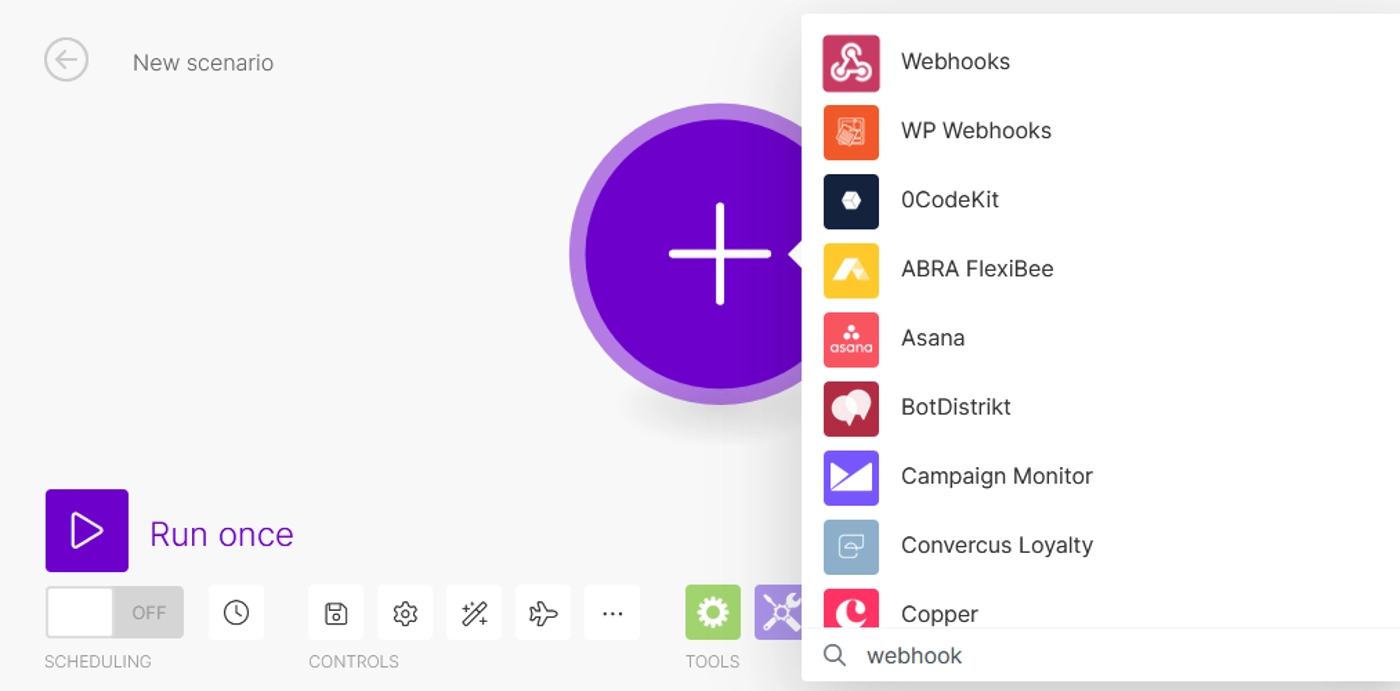
For the next phase, we will log in to make.com and create a new scenario. There are multiple ways to do that, but the easiest is on the homepage by clicking on "Create a new scenario" in the upper right corner.
Add a first trigger
To get a starting point for our workflow, we need to create a trigger action. In our case, we want to start the workflow every time a POST Request is sent to the workflow. For that, we have to create a webhook trigger.
Click on the purple + and select Webhook. You could also search for webhooks in the search bar at the end of the list.
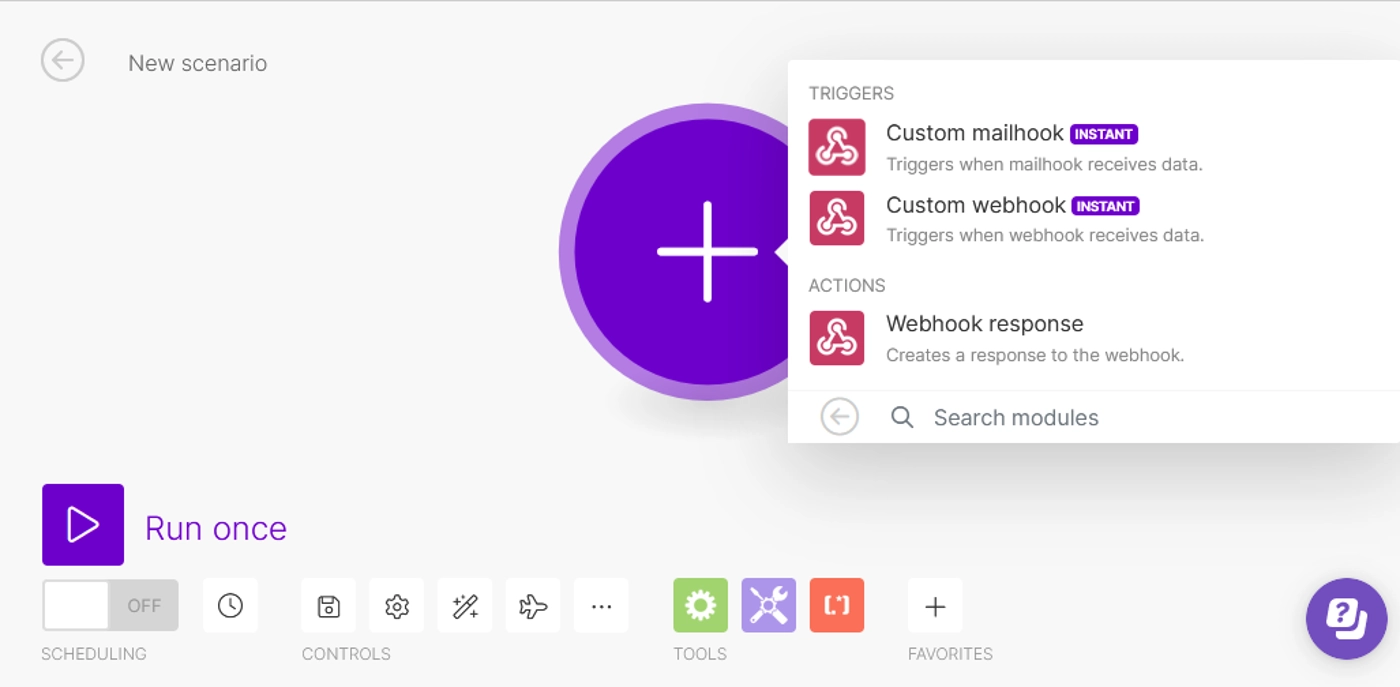
Select custom webhook
With Make, you have two choices: You could send an email to a generated email inbox from make and use the data you receive, or you could send an HTTP request that we want to use. Please choose a custom webhook.
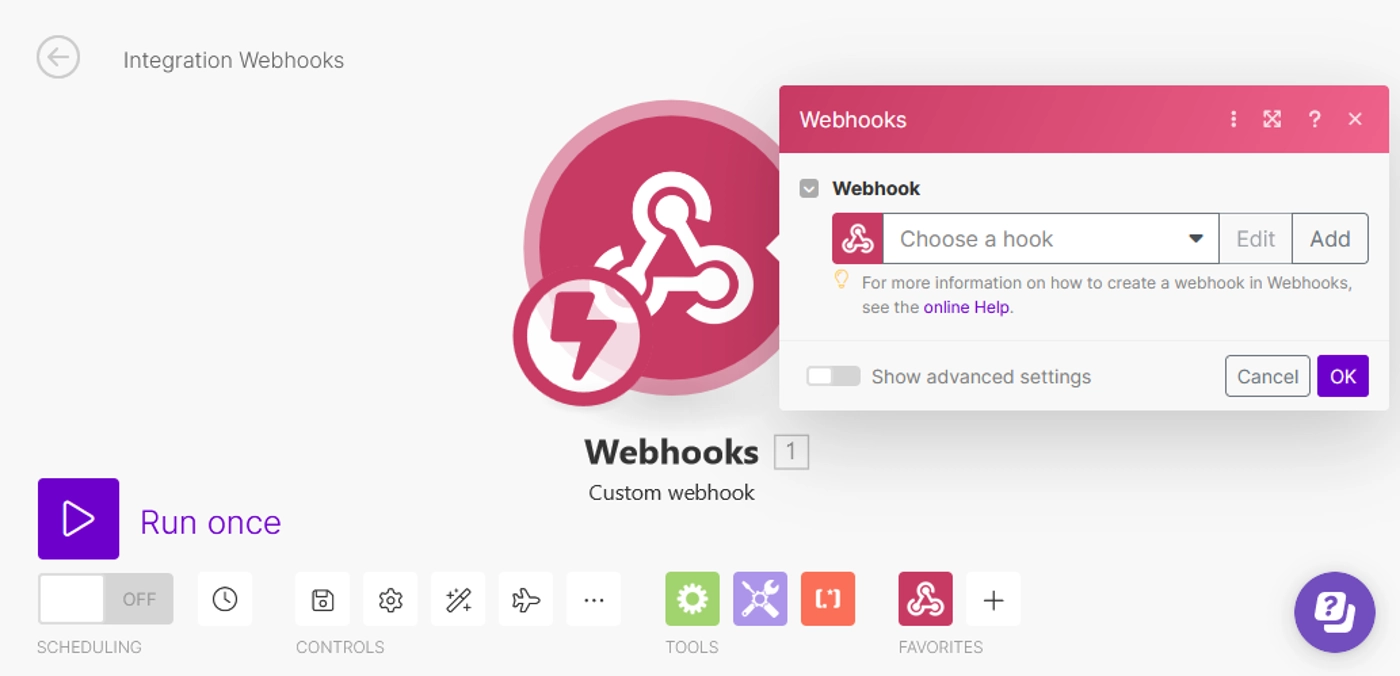
Create a new webhook template
Make gives you the choice of reusing an existing webhook or creating a new one. Since we probably don't have one, we will create one.
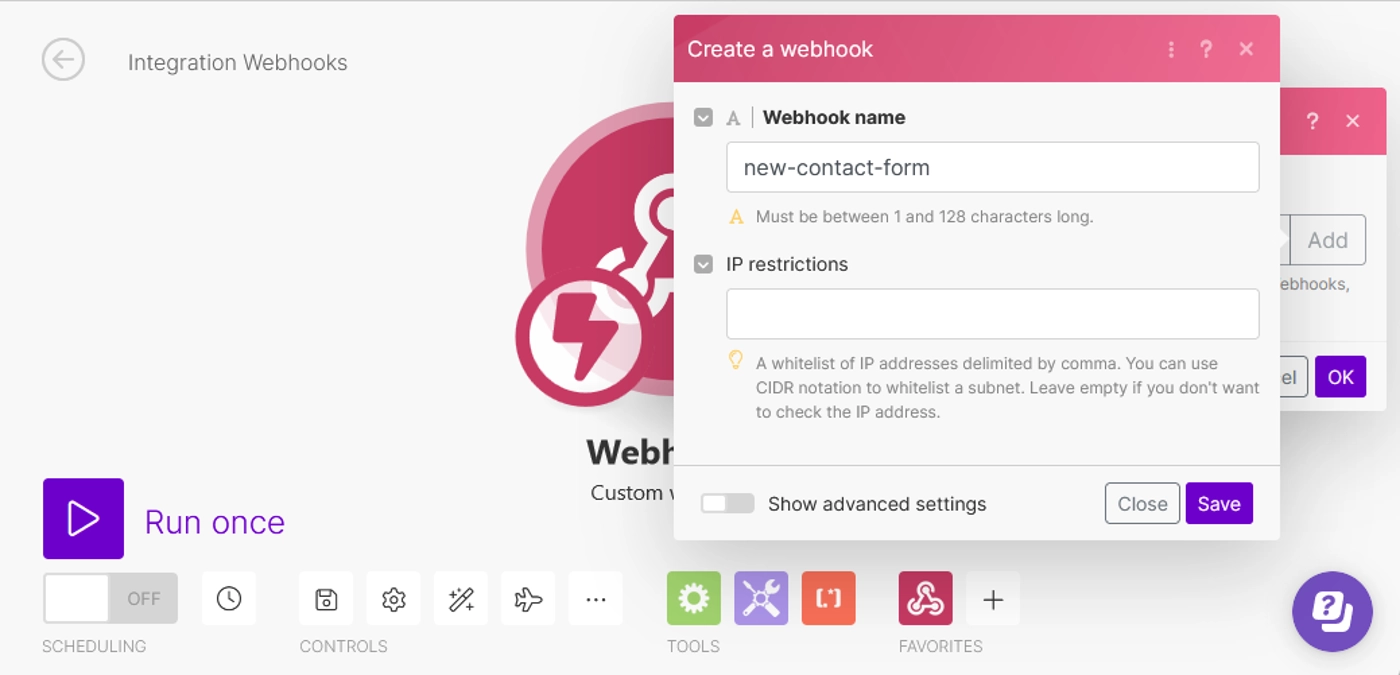
Name the webhook
We will click add to create a new webhook and give it a name. In the future, we could reuse this webhook for other workflows.
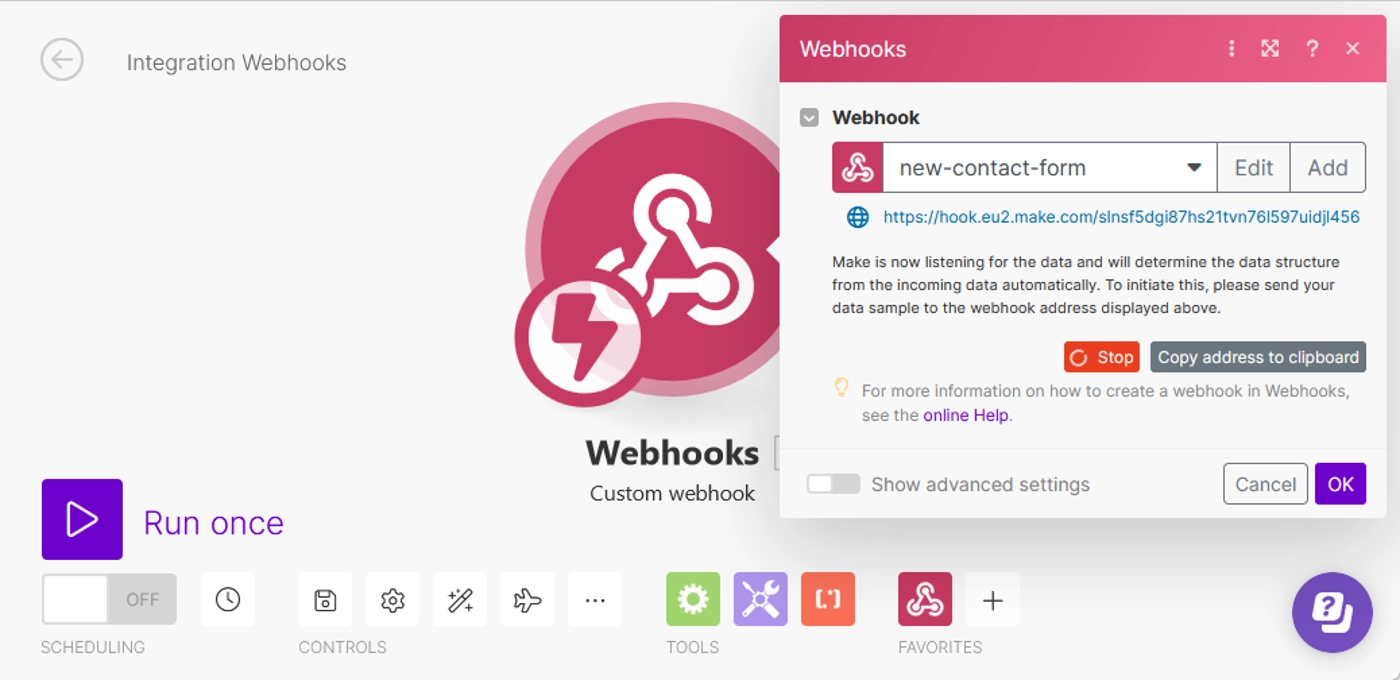
Test the webhook
Now that we receive the generated URL we need to put it in our form processor, which we made in step 2. Please be aware that this was hard-coded. But for this scenario, it should work. After you added the URL you have to send the form once. After all, you should receive a success message in this window.
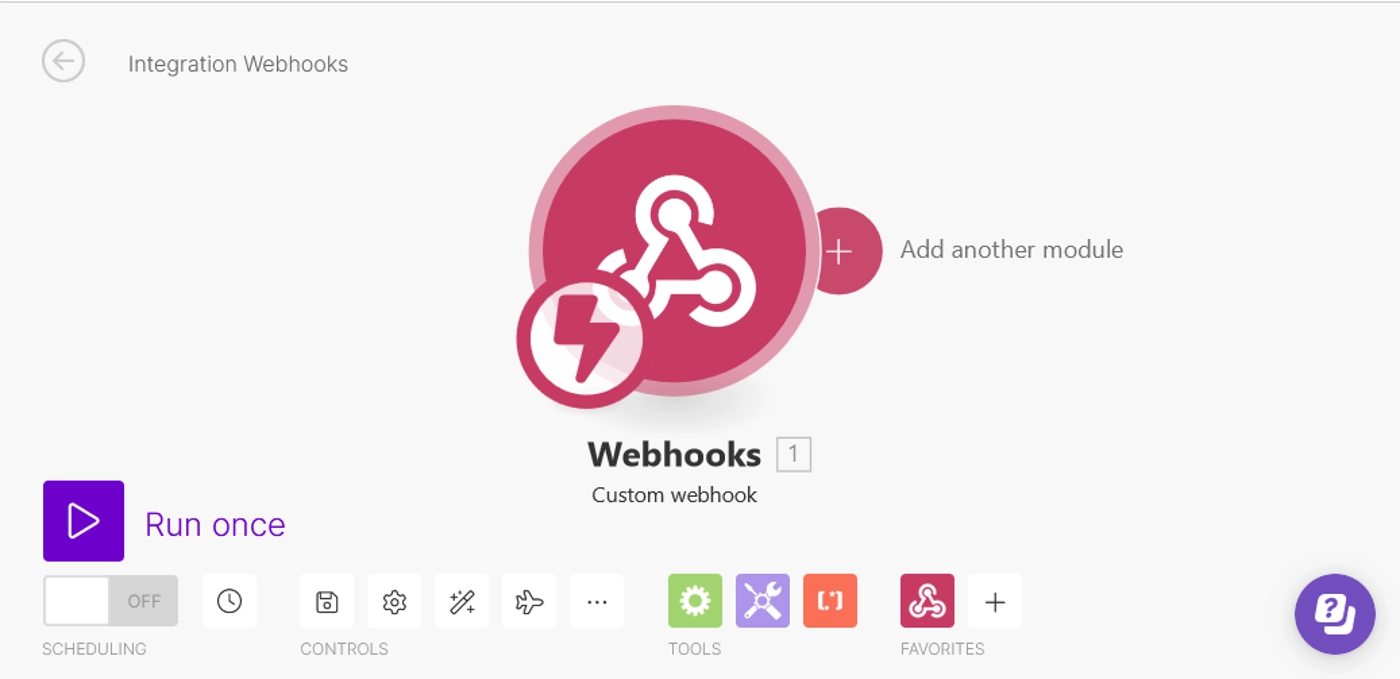
Add the next module
Congratulations! You have now created the input channel. Now comes the fun part. You can create a new module if you hover over the small plus icon.
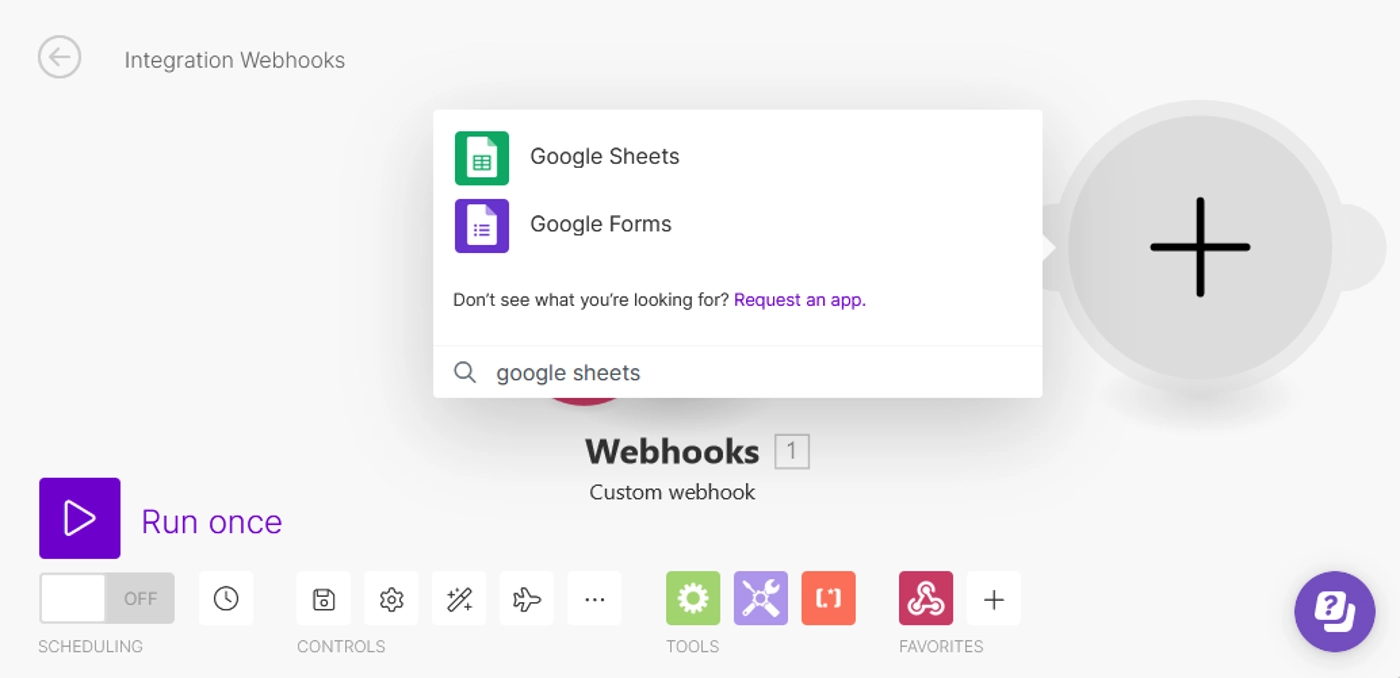
Create an action
As we want to send all incoming data to a google sheet the next step is to choose google sheets.
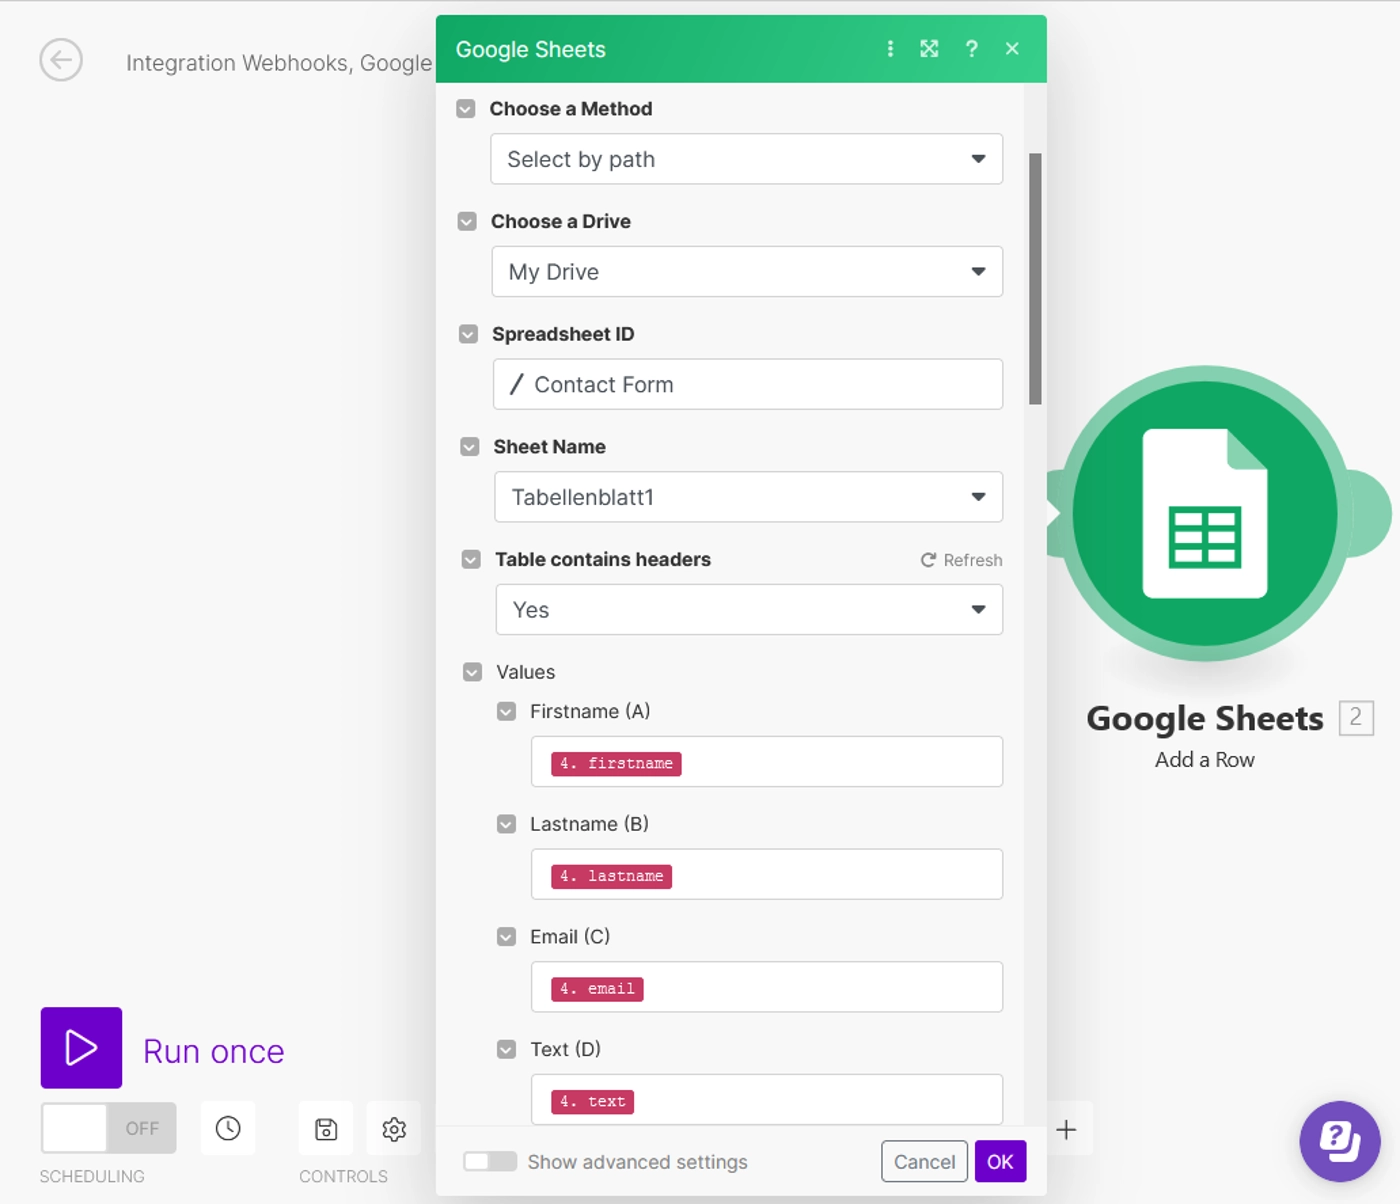
Connect your sheet
You could now connect to your google account and create a new row in an existing sheet. For that, you could create a sheet and add the columnnames in the first row. Afterward, you should be able to see the Labels of these columns in the values section, and you could select which data entry from the form should be transferred into it.
Step 4: Testing
If everything works correctly, you could now click on "Run once" and then try to send the form. After some milliseconds, the data should be automatically transferred to the google sheet.

Conclusion
Automation tools have streamlined the way you can interact between various systems. With an integration like we have shown in this tutorial, you could create workflows through a visual editor, and users without deep magnolia knowledge could create their automations. In addition to interaction, you could also trigger events after you published a page or any other action you could imagine.

Marvin Kerkhoff
Marvin Kerkhoff is a web developer since 2004. He started to work for Arvato Systems Schweiz 15 years ago. He did his Magnolia certification in 2010 and achieved the highest Magnolia certification in 2020. He has a strong background in broad E-Commerce and Digital Business projects with various customers.